If you haven’t guessed yet, we’re just obsessed with pizza here in the shoe box kitchen. After the first teaser post on thin crust pies, we thought we should fill in some of the details regarding the dough, since we find it both incredibly delicious and surprisingly simple.
Pizza dough can be – after all – a bit intimidating at first blush, if not just frustrating at second, third, and fourth blush. There are tons of blogs and websites just devoted to making pizza; the wealth of information can be overwhelming. But, in the end, after months of research, it is an adaptation of a very short recipe from an unassuming coffee table book that we have settled with and really really love here in the shoe box. If you like a thin, Neapolitan-style pizza crust (which is our favorite), we think you’ll love this recipe too.
Without further ado, here are the ingredients – nothing fancy here:
Neapolitan Pizza Dough
- 1 1/2 tsp active dry yeast (we use Fleischmann’s RapidRise)
- 1/4 cup lukewarm water (~ 105 degrees)
- 1/2 cup room temperature water (colder for less rise, warmer for more rise)
- 1 1/2 tbs olive oil
- 1 tbs honey
- 1 2/3 cup unbleached all-purpose flour (we use King Arthur)
- 3/4 tsp kosher salt
Start by adding the yeast to the lukewarm water in a large mixing bowl. Whisk until you can’t see the granules of yeast, then go ahead and add the olive oil and honey. Whisk until you have combined the honey and dispersed the oil. Let this mixture stand for a few minutes to start activating the yeast, then whisk in the room temperature water (we have used water ranging from 105 degrees to 40 degrees for this step – warmer water will give you a higher rise, thus “breadier dough,” and the converse is true for colder water – experiment and see what you like). Your mixture will now look something like this:
You’re done with the wet ingredients, time to add the dry. In a sifter, dump the flour followed by the salt, then begin sifting the dry ingredients just one or two cranks at a time into the wet, whisking each time to produce a homogeneous mixture before adding more dry ingredients. This gradual addition of dry ingredients helps ensure that the yeast is distributed evenly throughout the dough, providing an even oven spring (the rise that occurs in the oven).
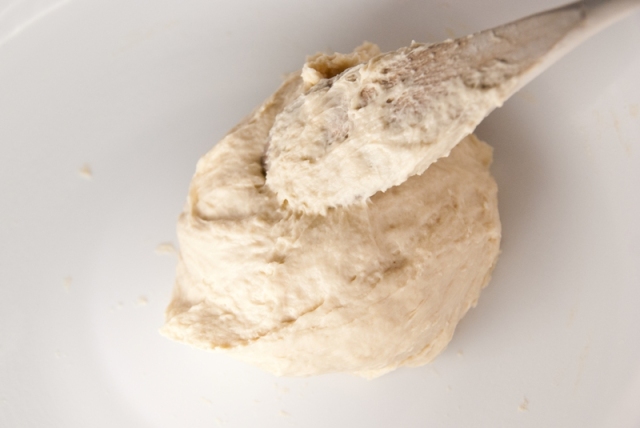
When you have added about half the dry ingredients, you will probably want to set the whisk aside and switch to a wooden spoon. Continue to add and mix in dry ingredients until the dough comes together in a ball. It will still be sticky, but you should be able to stir it around the mixing bowl and clean all the bits of flour off the sides of the bowl. That’s when you know you’re done adding flour. At this point we typically have about a tablespoon or so of flour left (usually what fell straight through the sifter when we dumped the flour into the sifter in the beginning – to save and use this flour, put your sifter in a bowl before filling it). Your dough should now look something like this:
Note the clean sides of the mixing bowl. There should be no loose flour in the bowl at this point. When you’ve achieved this dough ball, it’s time to do some kneading. We say “some” kneading because, frankly, this is where you are going to have to experiment to your liking. When we first started using this recipe, we would knead for 8-10 minutes. These days we knead for maybe 2 minutes, less if we get bored. The point is: if you added the dry ingredients gradually there isn’t a big need to knead. You are using active yeast and you are making thin crust; over-kneading will do two things: 1) make your thin crust not so thin, and 2) result in a tougher dough.
So, sprinkle a little flour on the dough ball, put more on your hands (the dough is going to be pretty sticky still), and work your fist through the dough half a dozen times or so just until the texture of the dough becomes a bit smoother. Don’t overdo it. You’ll now have something that looks like this:
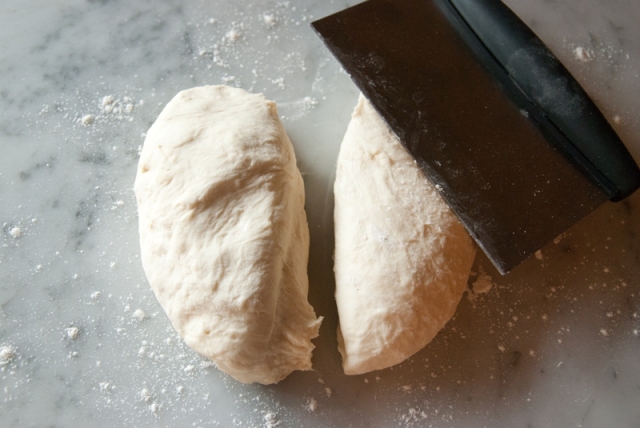
Let this beautiful ball sit and rest for a few minutes, then transfer to a flat, floured surface. Roll the dough as best you can into an even sphere, then use a pastry cutter or sharp, flat-edged knife to cut the ball in half.
Coat the surfaces of two bowls with olive oil, roll each half of dough back into a ball, and drop each half into a bowl. Turn the dough once to coat both sides in oil.
Cover the bowls with plastic wrap, then place them in a warm area (outside, if you’re in Atlanta) and place a kitchen towel over them. This dough will rise for about an hour. This is the time to start preheating your oven to 500 degrees, with a pizza stone sitting on the very lowest rack. Alternatively, you can preheat your Big Green Egg for an hour at 500 degrees using an indirect setup and pizza stone. The bottom line: PREHEAT – for at least an hour. You can use this extra time to start prepping your toppings and treating yourself to a glass of Pinot Noir.
After an hour, depending on the temperature of your water, the temperature of the ambient air where your dough is rising, the position of the stars, etc. (the best dough we ever made was a batch that we let rise outside on a hot day just after a thunderstorm), your dough will look something like this:
The next step gets messy – well, for us, anyway. We like to put down aluminum foil or newspaper on a big table and dress our pizzas there. We prepare our pies on a pizza peel, which serves as the perfect tool to transfer a flimsy, thin disc of dough onto a really hot pizza stone.
Sprinkle a generous amount of flour on the pizza peel because this dough will be very moist and, therefore, sticky. Put a generous amount of flour on your hands and remove one of the dough balls. Begin turning it in your hands, letting gravity stretch it into a disc about the size of a bread plate, then throw the dough disc onto the pizza peel. Sprinkle a generous amount of flour on your rolling pin and roll the disc out using unidirectional strokes, working from the center out to the edges, until you have a thin disc that fills your pizza peel. The bigger the peel the better, because you can roll this particular dough about as thin as you want to – peel space is your only limitation. Incidentally, if the dough is acting stubbornly springy, just walk away for 5 minutes and come back to it – after relaxing a bit it should cooperate more willingly.
At this point your dough will probably be stuck to your peel. Don’t panic. Simply lift the disc up about half way on one side, toss some flour underneath it, then repeat on the other side. Then give the peel a quick shake using a very short and quick motion – the disc of dough should now slide back and forth freely. You may want to roll it out again at this point to recapture that perfect shape you want.
Now, coat the entire surface of the dough with extra virgin olive oil. This will enhance browning and crispiness. Note that we do not use a sauce on our thin crust – as mentioned in Part 1 of this post, we like to keep the crust crispy and let the toppings create all the flavor. When you’re done adding the olive oil, give the peel a quick shake to make sure the dough still slides. If it is stuck and a few quick shakes won’t loosen it, pick it up and throw more flour underneath.
Now add your toppings. We have found that one of the keys to a crispy crust is the use of thinly-sliced, low-moisture toppings. As you add each topping, give the peel a quick shake to keep the dough from sticking to the peel.
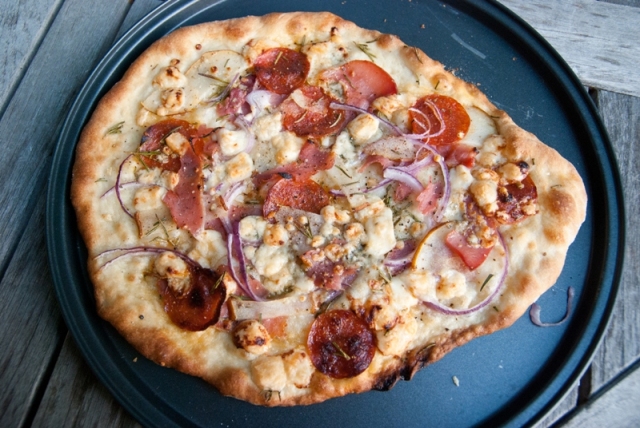
This particular pie had garlic, rosemary, pear, honey, prosciutto, pepperoni, red onion, and gorgonzola. We have just fallen in love with pear on pizza, by the way.
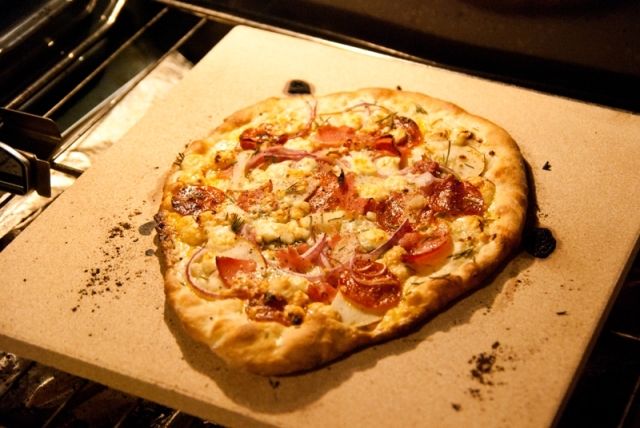
Now, to transfer the pie to the stone, give the peel one more quick shake to make sure the dough isn’t sticking, then open your oven and plant the nose of the peel into the back of the stone, then give the peel a quick shake and pull it back towards you to gradually “paint” the pie onto the pizza stone.
At 500 degrees, we usually cook these thin pies for 8-9 minutes (just enough time to roll out and dress your next pie!). You’ll be able to tell that your Italian treat is done by the browning of the toppings and the edges of the crust.
At this point, the crust should be nice and crisp, so we just use a metal spatula to scoop the pie onto a baking pan.
Because the crust is so thin and, well, it’s just so so good, one of these pies usually serves one hungry adult, maybe 1.5 adults if you serve a hearty salad on the side. The dough recipe scales up just fine, and you can even freeze the dough in plastic bags (at the step before the rise) for use at a later date. Simply sit it out in a warm area for a few hours to thaw (it will also rise just slightly, and it will have more flavor due to the extended thaw/rise time).
If your kitchen looks like a flour bomb went off, you have dried dough all over your clothes, and you’re just plain frustrated after the first time you try this recipe, don’t lose heart. After just a few times of practice you’ll be churning out pies that would impress the most discerning tastes of Napoli.
Buon appetito!


Pingback: Gifts from the Hot Stone (Part 1) | TheshoeboxKitchen